Blog
Reconstructions: an image of the past?
We're delighted to publish here this guest blog post, by Lorenzo Caravaggi, who is currently working on some digital visualisations of medieval Swansea, based on our project research. Lorenzo is a BA History student at Birkbeck, University of London. Many thanks to Lorenzo for this interesting insight into the process and theory of producing a visualisation of an historic landscape. Read Lorenzo's post here:
Reconstructions of historical landscapes are both fascinating and very helpful in understanding what a certain place may have looked like in the past. Archaeologists can read the structure of buildings, streets and cities by ‘simply’ looking at the remains of walls and other archaeological findings. However, people who do not have extensive background knowledge of archaeology and architecture would find it difficult to imagine what an archaeological site looked like: confusion can be perceived, and in many cases we would even find it difficult to imagine that over those few stones and postholes stood a mighty building! The power of images overcomes this difficulty, allowing non-experts to visualise and imagine the past. Reconstructions of buildings are not a new trend: already in the sixteenth century, when interest for ancient buildings began to increase, humanists and architects produced drawings which attempted to reconstruct the appearance of classical buildings. Today, what computer graphics allow us to do is to transform these drawings into photo-realistic images, in order to greatly enhance the experience of the viewer. This said, we should not think that renders correspond to absolute reality: indeed, reconstructions are dictated by a more or less strong degree of hypothesis. Therefore, renders are not ‘pictures of the past’, but rather, ‘pictures of a likely past’.
Thinking Buildings
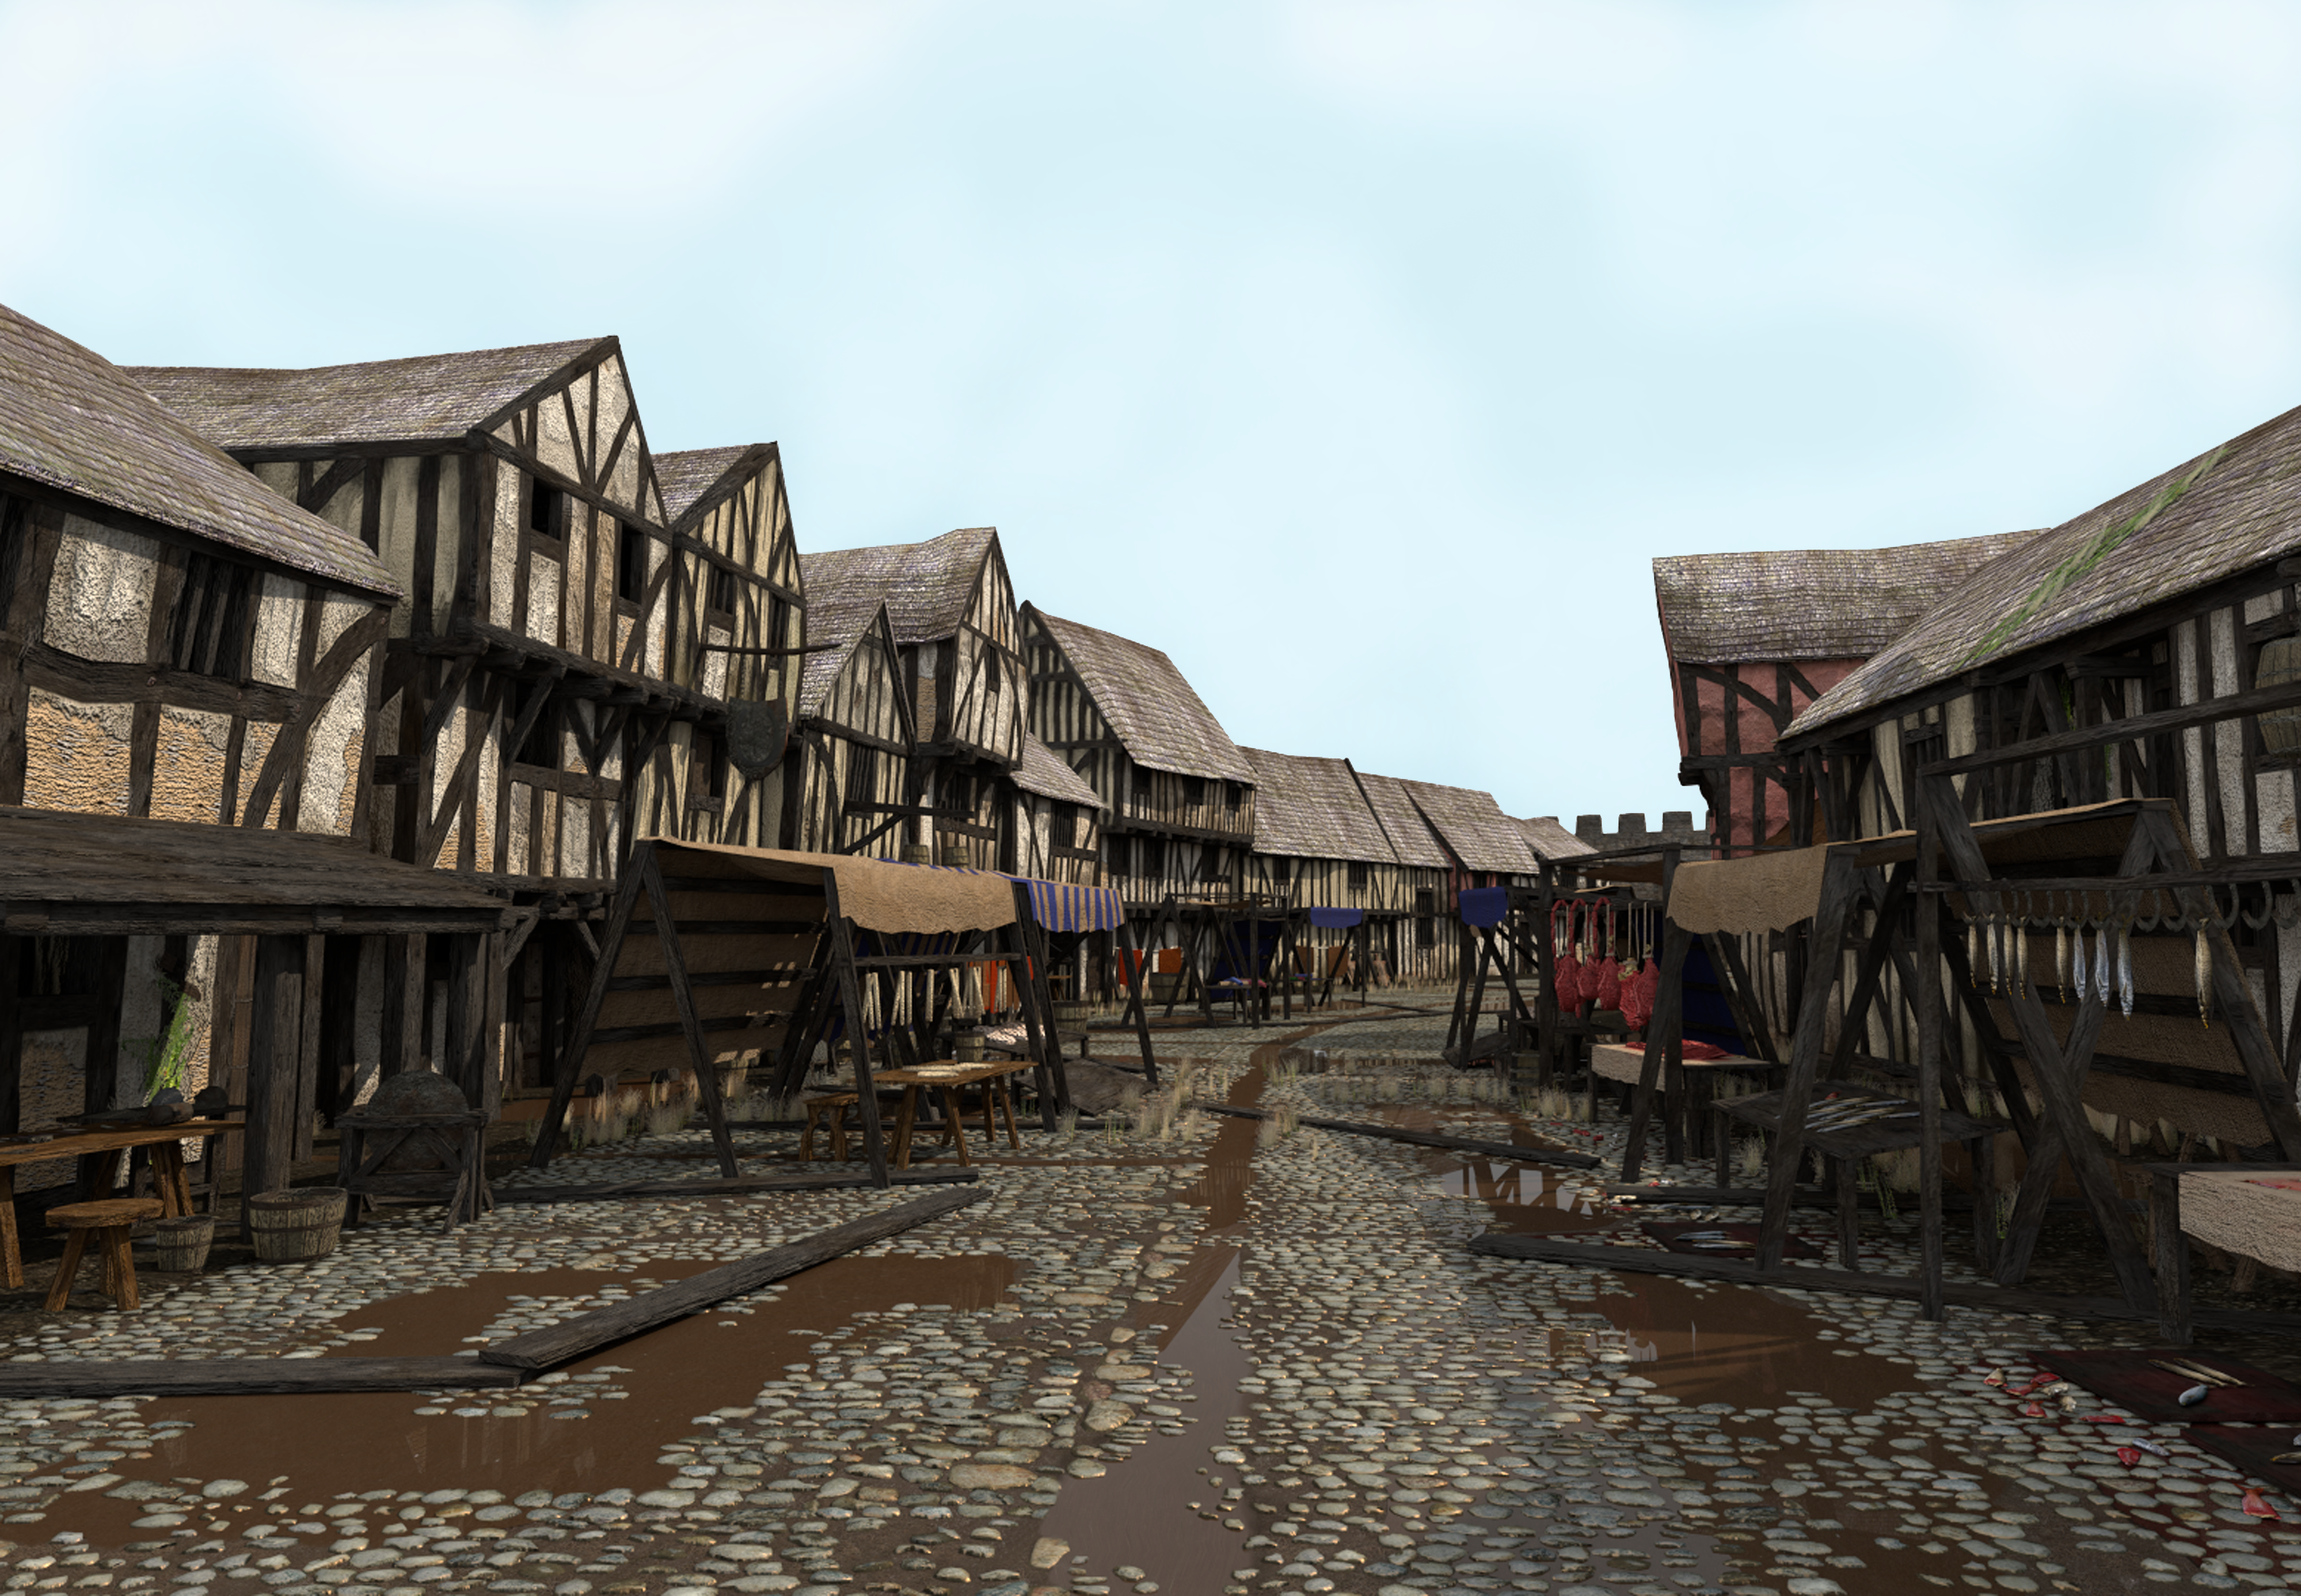
How do we know what to include in a render, then? In order to create an acceptable result, we must follow two main steps. First of all, we follow whatever archaeological findings we have: say we are hypothetically trying to model a building of which we know nothing but the layout of its foundations; we will then create a shape which covers exactly the same area covered by those foundations. Further archaeological excavations reveal that this building had a certain function (commercial, religious, domestic, military, and so on). At this point we will more or less know what kind of building we are facing. However, we do not have any more material findings to help us create an image of its past appearance. We then move on to the second point, which is working by analogies. Say this hypothetical building is a private house: what we can do at this point is look at similar examples of still-standing buildings, to understand what this house may have looked like, and model it accordingly. The houses in the render of Wind Street were indeed modelled following this system: their dimensions were based on the map given to me by the team, whereas their aspect was created following examples from fourteenth- and fifteenth-century timber-framed houses from other cities in Britain, such as York, Salisbury and Southampton.
3D Modelling
As for the modelling part itself, I like to think of it as an intersection between a drawing, a painting, and a ‘Lego’ construction. The programme I used is called Blender and is an open-source software downloadable from the web (www.blender.org). It all starts with a grey plane, which is then subdivided and modified until it assumes the aspect of a house. Once the model is done, we have to apply colours, which in this case, are called textures. In order to do this, I needed to create suitable materials: therefore, I took and looked for photos of timber, plaster and clay (plus many other materials), edited and assembled them together in Photoshop, and eventually applied them to the model, by assigning every ‘face’ to a different part of the texture. Once this process was done for every single model (from the cobbles on the streets to the houses and market stalls) I set a background photo for the sky, added sunlight to the scene, and enabled reflections, shadows and glossiness. The last step is to render the image, which means passing from a lightless visualisation of the simply textured models to a scene in which sunlight creates an impression of photo-realism.
